DIY hacks can simplify your life and tackle everyday challenges. From using uncooked spaghetti to safely light candles to removing highlighter stains with lemon juice, these clever tips can save you time and energy. Want to feed your puppy slowly? Try a creative feeder hack! You can even take care of scuff marks on your shoes or easily manage your garden with smart storage solutions. Stick around, and you’ll discover more ingenious ideas that will make your life easier.
1. Pasta Lighter
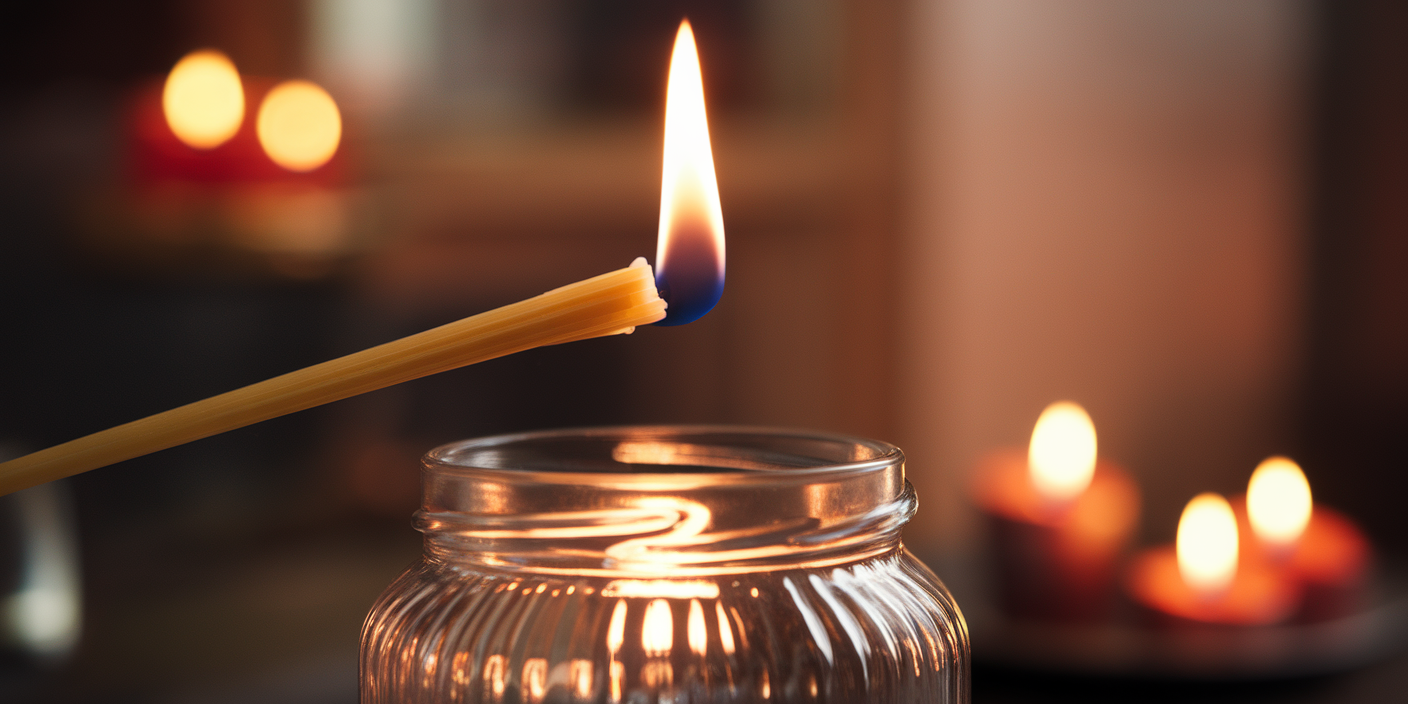
When it comes to lighting deep candles, you might be surprised to learn that a simple piece of uncooked spaghetti can be your best friend.
This clever life hack works great for special occasions like birthdays, where reaching the wick can be tricky. Just light one end of the spaghetti; it burns steadily, allowing you to light your candle without risking singed fingers or melted wax on your hands.
Not only does this technique make your life easier, but it’s also environmentally friendly, letting you use up leftover pasta that would otherwise go to waste.
2. Remove Highlighter Stains
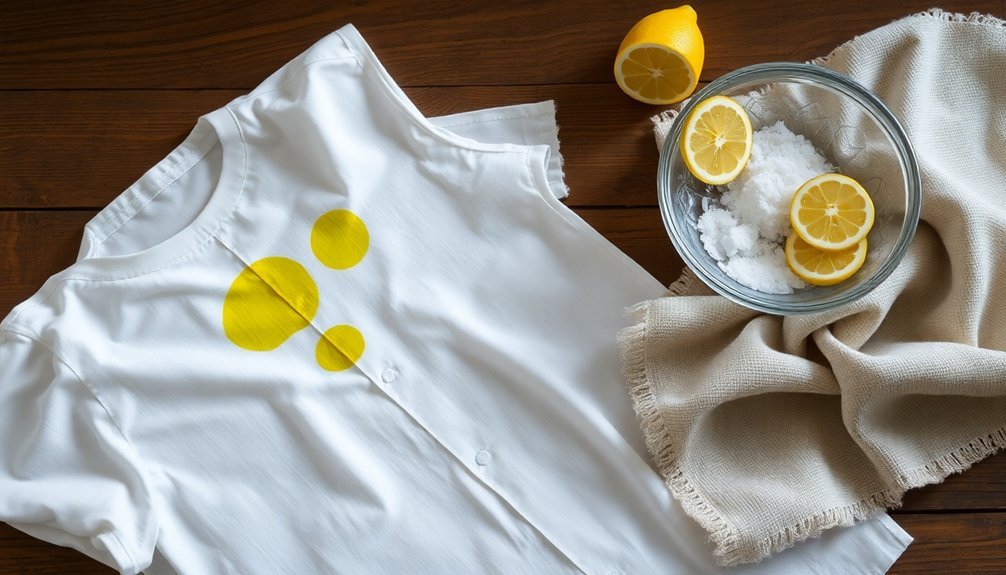
After you’ve successfully lit those tricky candles with spaghetti, you might find yourself dealing with a different kind of challenge: highlighter stains.
Don’t worry; removing them is easier than you think! Grab some fresh lemon juice, as it’s more effective than bottled options. Using a cotton swab, apply the juice directly to the stain.
If the mark is older, act quickly for the best stain removal results. Before you plunge in, test the lemon juice on a small, inconspicuous area of the paper to prevent .
Let the lemon juice sit for a few minutes, then blot the area with a clean cloth to absorb the stain. With this simple hack, you’ll be back to a clean page in no time!
3. Puppy Slow Feeder
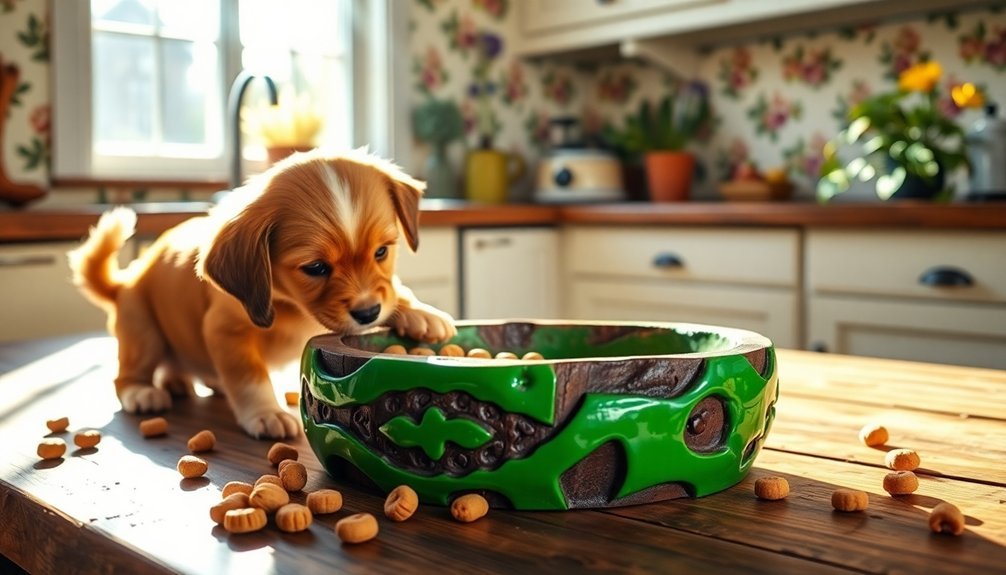
If you’re looking to turn mealtime into an engaging experience for your puppy, a DIY slow feeder is a fantastic solution.
By using a PVC pipe, you can create an effective puppy slow feeder that helps slow down their eating, promoting better digestion while saving money.
Here’s how you can make one:
- Choose a suitable PVC pipe length based on your puppy’s size.
- Drill holes throughout the pipe to allow food to be dispensed slowly.
- Fill the pipe with your puppy’s kibble.
- Secure the ends to keep the food contained.
This fun feeding method encourages mental stimulation as your puppy figures out how to access the food, transforming mealtime into an entertaining challenge!
4. Identify Your Keys at a Glance
Tired of fumbling through a jumble of keys? Grab some brightly colored nail polish and transform your key heads into a vibrant, organized system that makes finding the right key a breeze.
With a little creativity and a few simple tools, you can streamline your daily routine and reclaim your time.
Color-Coded Nail Polish
While juggling a busy lifestyle, the last thing you need is to waste time fumbling through a jumbled keyring.
Color-coded nail polish can make it easier to identify your keys at a glance, saving you precious moments. Here’s how to do it:
- Choose vibrant nail polish colors for each key.
- Paint the key heads and let them dry completely.
- Assign colors based on the lock type or location.
- Enjoy the added security of identifiable keys without costly duplication.
This budget-friendly hack not only brightens your keyring but also enhances your organization.
A single bottle of nail polish can transform multiple keys, proving that a little creativity goes a long way in saving money and time.
Durable Paint Alternatives
Color-coded keys can greatly enhance your organization, but there are even more durable paint alternatives to contemplate for long-lasting results. One of the best options is nail polish.
It’s not only vibrant and eye-catching but also more durable than traditional spray paint, ensuring your colors stay bright even with daily use. You can easily assign different colors to various keys—think red for your house key and blue for your car key.
This method is cost-effective, requiring just a small bottle of nail polish that you might already have at home or can purchase inexpensively. By using nail polish for your keys, you’ll streamline your daily routine, minimize frustration, and keep your keys easily identifiable.
Easy Key Organization
Identifying your keys at a glance can save you time and reduce daily frustration. Here are some simple hacks to keep your keys organized:
- Color Code: Paint key heads with brightly colored nail polish for quick identification.
- Patterns: Use different patterns or designs on key heads with nail polish or tape to differentiate them easily.
- Key Tags: Attach key tags with printed labels to your key rings for clear identification.
- Key Holder: Organize your keys in a dedicated key holder or rack, grouping them by function—house, car, office—to streamline access.
5. Pool Noodle Hose
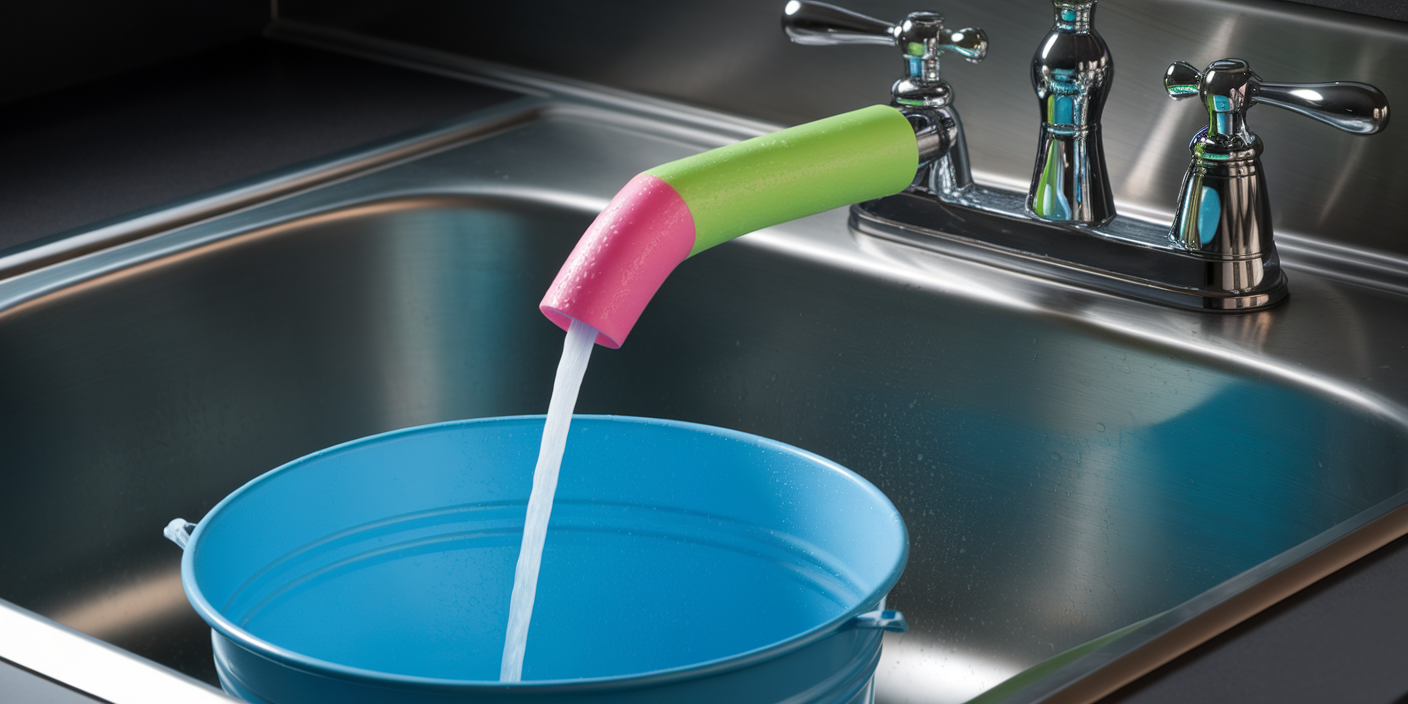
One simple DIY hack can transform how you fill awkwardly shaped containers: the pool noodle hose.
By cutting a pool noodle to the length you need and slicing it along one side, you create a perfect guide for directing flow from your hose into buckets or pots that won’t fit under the faucet.
This clever trick prevents spills and messes, making it an efficient solution for garden enthusiasts or anyone needing to fill large containers without hassle.
Simply position the noodle over the faucet, and let the flow into your vessel.
Not only does this save time, but it also minimizes waste, empowering you to tackle your ing tasks with ease and confidence.
6. Keep Seeds Fresh
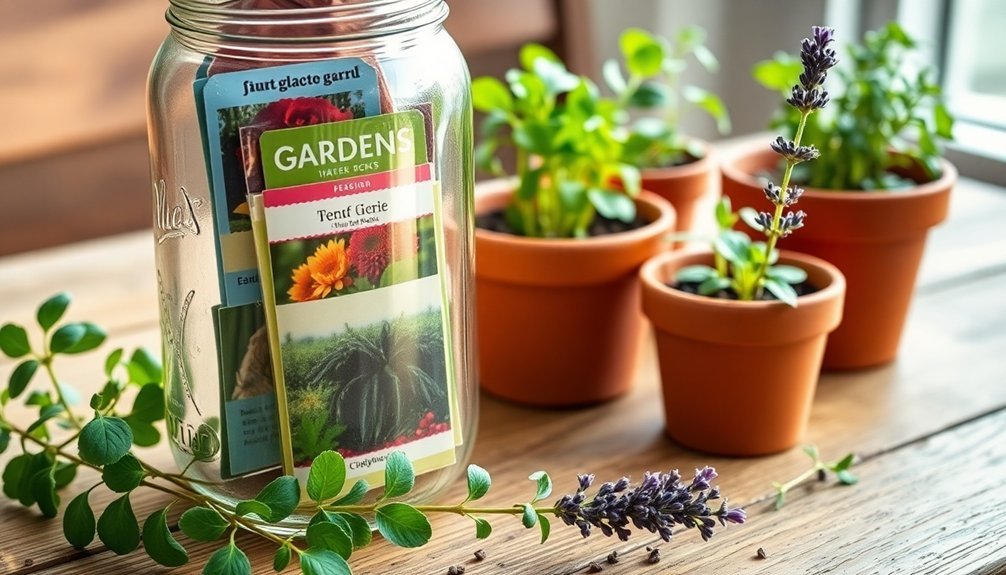
To keep your seeds fresh and ready for planting, start by storing them in an airtight container that protects against moisture.
Adding silica gel packets will help absorb any excess humidity, ensuring your seeds stay viable longer.
Airtight Container Storage
When you want to keep your seeds fresh for the next planting season, investing in airtight container storage is a game changer.
Here’s how to do it effectively:
- Choose a quality airtight container to protect your seeds from moisture.
- Store seed packets in a cool, dark place to enhance their longevity.
- Label containers with the seed type and date stored for easy identification.
- Regularly check for moisture or pests to maintain the integrity of your collection.
Silica Packet Inclusion
While you might think that simply storing seeds in an airtight container is enough, adding silica packets can greatly enhance their longevity.
These handy little packets absorb excess moisture, preventing germination and mold growth that can threaten seed viability. By including silica packets, you create an environment that keeps seeds dry, extending their shelf life for the next planting season.
Plus, it’s a simple yet effective way to promote sustainable gardening practices, reducing waste and ensuring your seeds are ready to thrive when you need them.
Just remember to regularly check the condition of your silica packets and replace them if they become saturated. This small step can make a big difference in your gardening success!
Ideal Temperature Conditions
Keeping seeds fresh is all about the right environment, and that starts with temperature. To guarantee your seeds stay viable, follow these tips:
- Store seeds in a cool, dark place between 32°F to 41°F (0°C to 5°C).
- Use airtight containers, like glass jars or vacuum-sealed bags, to keep out moisture and pests.
- Include silica gel packets in your storage to absorb any excess moisture.
- Regularly check your seeds for mold or , discarding any that show signs of deterioration.
7. Fog-Free Mirrors
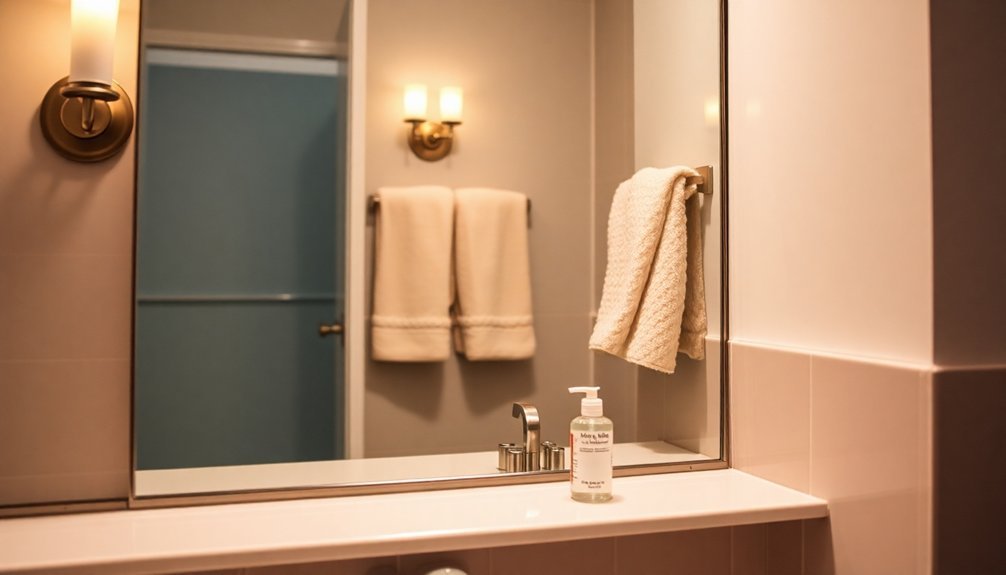
Tired of stepping out of the shower only to be greeted by a fogged-up mirror? You can banish that annoyance with a simple hack!
Grab some car wax—yes, the same stuff you use for your car. Apply a thin layer to your bathroom mirror, let it dry, then buff it with a soft cloth for a crystal-clear finish.
This method creates a protective barrier that reduces condensation and keeps your reflection sharp for weeks. If you want to maintain clarity elsewhere, try it on shower doors too!
Need a quick fix? A wet paper towel with a bit of dish soap can help, but for lasting results, car wax is your best bet. Enjoy a fog-free bathroom experience!
8. Easy Way to Disinfect Legos
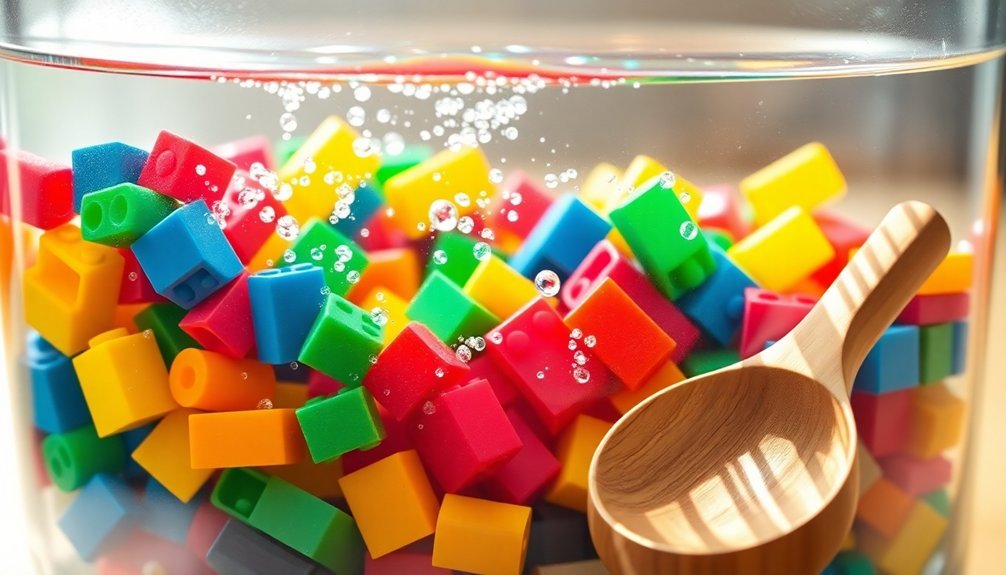
If you’ve ever watched your kids play with Legos, you know how quickly those colorful bricks can collect dirt and germs.
Keeping them clean is essential for safe playtime. Here’s an easy way to disinfect Legos:
- Place the Legos in a mesh laundry bag to keep them organized.
- Run the dishwasher on a regular cycle, but make sure to skip the drying cycle to avoid .
- After washing, let them air dry on a towel.
- For a fun twist, toss in a few ice cubes to help dislodge stuck dirt and grime.
This method not only sanitizes their toys but also keeps germs at bay, ensuring your kids have a safe and clean play environment.
9. Renew Your Furniture in Minutes

Revamping your furniture doesn’t have to be an intimidating task; in fact, you can breathe new life into your beloved pieces in just a few minutes.
Start by using a hair dryer to soften sticker adhesive on old furniture, making it easy to peel off without damaging the surface.
For a quick refresh, mix vinegar and olive oil to clean and condition wood simultaneously.
If you want a complete makeover, consider reupholstering chairs with fabric remnants.
Chalk paint is another fantastic option; it requires no primer and transforms your furniture’s color in just a couple of hours.
Finally, rub a walnut over scratches to restore shine, as its natural oils effectively disguise imperfections.
You’ll love the results!
10. Tape Template
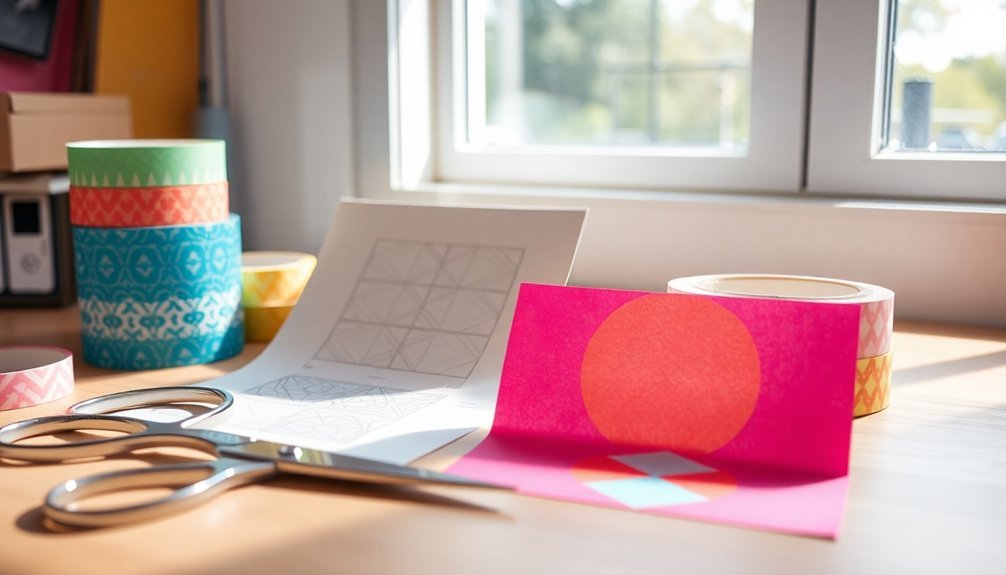
Once you’ve given your furniture a fresh look, it’s time to tackle wall decor with confidence. Creating a tape template is your secret weapon for precision and ease. Here’s how to do it:
- Wrap it around the back of your picture frame or decor item.
- Mark one end of the tape with a pencil at the desired height.
- Stick the tape on the wall, aligning it with your marks for accurate placement.
- Next time, use the tape as a guide for screw placement to minimize wall holes.
This simple method lets you adjust as needed, making your DIY projects effortless while keeping your workspace tidy.
Say goodbye to guesswork and hello to perfectly arranged decor!
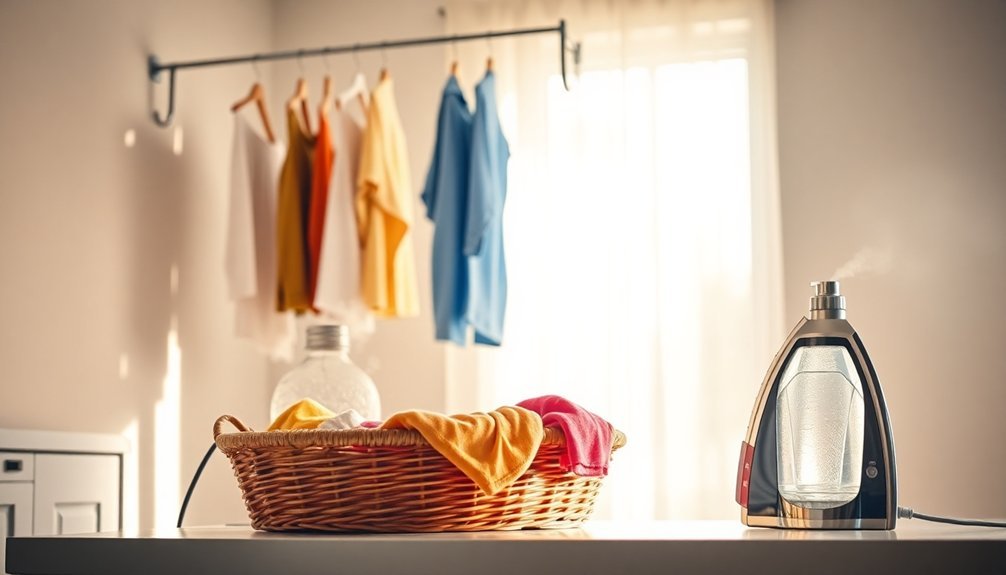
11. Get Wrinkles Out of Your Laundry With Zero Effort
Tired of battling wrinkles in your laundry?
You can easily transform your drying routine by tossing in a few ice cubes or a damp washcloth; it’s a game-changer that releases wrinkles in just 10 minutes.
Want a quicker fix? A light spray of on your clothes before drying works wonders too!
Ice Cube Trick
There’s a simple solution for those pesky wrinkles that seem to appear out of nowhere in your laundry.
Try the ice cube trick! It’s quick and effective, letting you refresh your clothes without the hassle of ironing.
Here’s how to do it:
- Toss a few ice cubes into the dryer with your wrinkled garments.
- Add a damp washcloth to enhance the steaming effect.
- Set the dryer on a medium heat for about 10 minutes.
- Enjoy wrinkle-free clothes, ready to wear!
The steam from the melting ice cubes penetrates the fabric, relaxing the fibers and allowing them to return to their original shape.
This method not only saves time but also reduces wear and tear on your clothing.
Spray Method
If you’ve ever felt frustrated by stubborn wrinkles but dread the thought of ironing, the spray method is your new best friend.
Simply grab a spray bottle, fill it with , and lightly mist the wrinkled fabric. Hang your clothes to dry, allowing the steam from the moisture to relax the fibers and release those pesky wrinkles.
For an extra boost, add a few drops of fabric softener to the for a pleasant scent. This technique works wonders on lighter fabrics like cotton and linen.
Need a quick fix? Toss a damp washcloth or a few ice cubes in the dryer with your clothes for about 10 minutes to create steam that effortlessly smooths out wrinkles.
12. Plant-in-a-Pot Landscaping Design
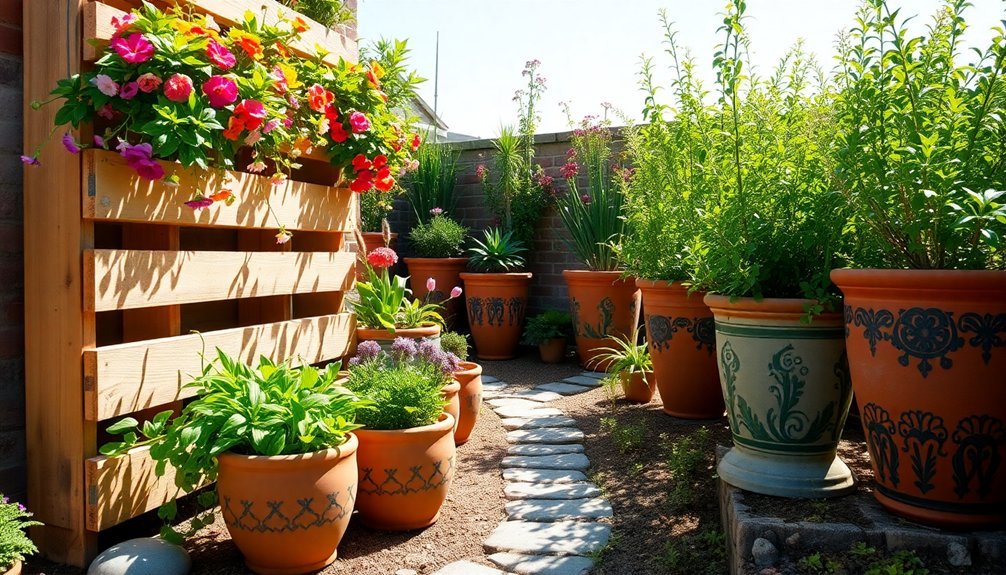
Plant-in-a-Pot landscaping design offers you the chance to transform even the smallest spaces into vibrant, lush displays. This approach is perfect for urban gardening, enabling you to create stunning arrangements with ease.
Here are some tips to maximize your plant-in-a-pot experience:
- Double Pots: Enhance accessibility and mobility by using double pots, allowing for easy seasonal rearrangements.
- Efficient ing: Design your top pot to drain into the bottom, reducing wastage.
- Multifunctional Gardens: Combine herbs and flowers in one pot for culinary and aesthetic benefits.
- Decorative Pots: Choose stylish pots to boost your outdoor space’s curb appeal while simplifying maintenance.
With these hacks, you’ll enjoy a thriving, beautiful garden!
13. Dryer Lint Fire Starter
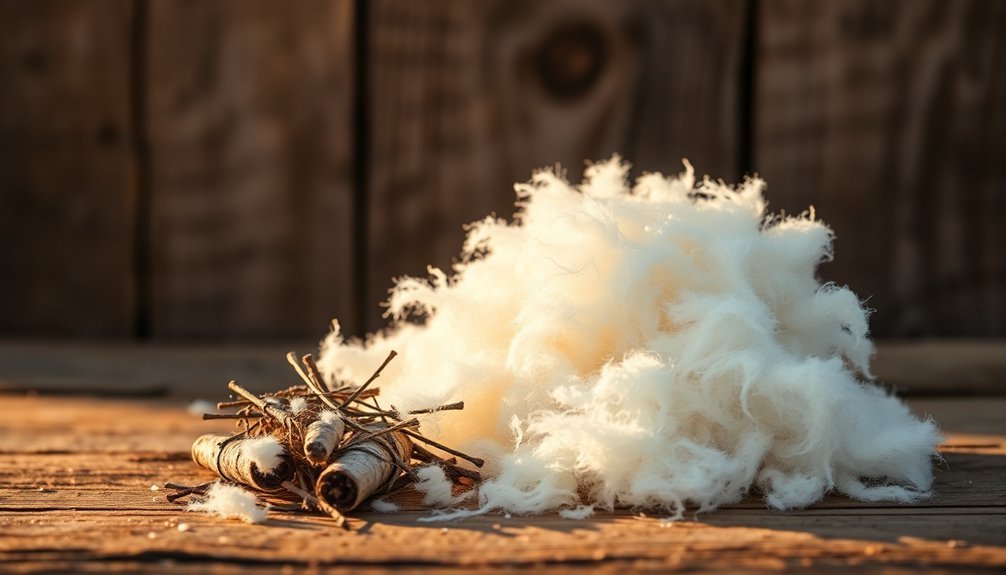
Creating your own fire starters using dryer lint is a simple yet effective way to enhance your outdoor adventures. Instead of tossing that lint, gather it after each laundry cycle. It’s highly flammable, making it perfect tinder.
To make fire starters, stuff the dryer lint into empty toilet paper tubes. This eco-friendly hack repurposes waste and guarantees you have a reliable fire starter on hand for camping trips or backyard fire pits.
Each tube ignites quickly, burning for several minutes to help catch kindling. With just a little preparation, you’ll easily ignite larger pieces of wood, turning a challenging task into a breeze.
14. Zip-Tie Phone Stand
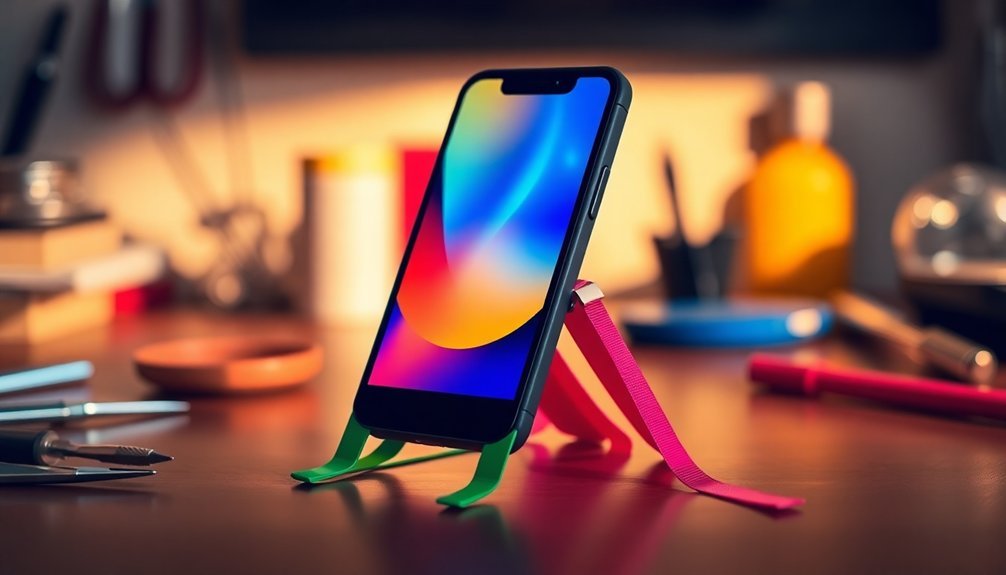
Need a quick and budget-friendly way to prop up your phone? The zip-tie phone stand is the perfect DIY project for you!
It’s an easy, practical solution that encourages resourcefulness. Here’s how you can create one:
- Gather a few zip ties and a sturdy base.
- Secure two zip ties in a loop shape to form a stable base.
- Adjust the height and angle by adding more zip ties as needed.
- Enjoy your customizable stand that fits various phone sizes!
This hack not only saves you money but also promotes recycling materials you may already have at home.
Plus, it’s easily adjustable and portable, making it perfect for your on-the-go lifestyle!
15. Secret Cash Stash
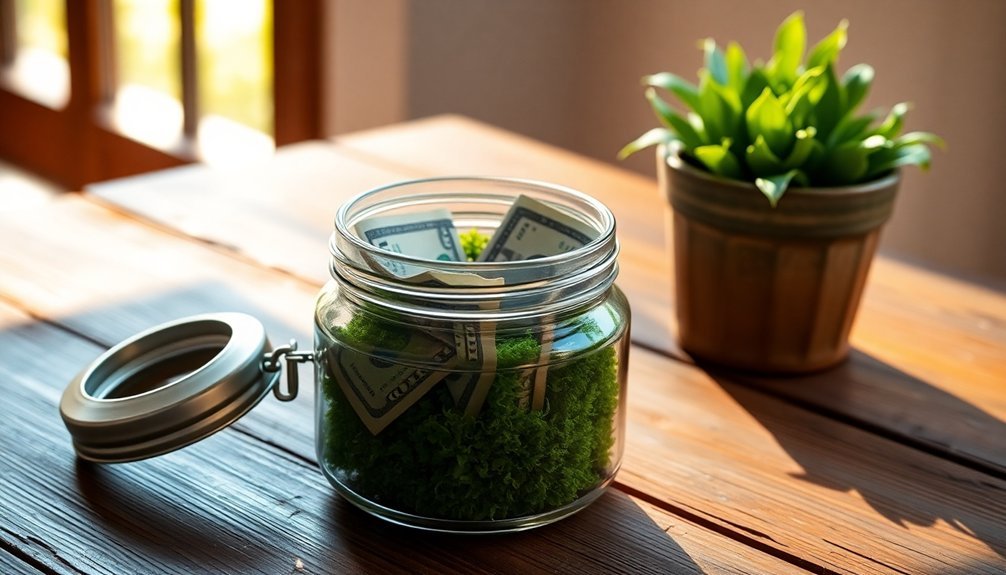
Ever thought about how to keep your cash safe from prying eyes?
Using everyday items like an empty lotion bottle or a fake electrical outlet cover can turn your home into a fortress for your money.
Let’s explore some creative hiding spots that’ll not only secure your funds but also give you peace of mind.
Hidden Storage Ideas
While you might think traditional safes are the only way to keep your cash secure, there are plenty of creative and discreet options that can blend seamlessly into your home.
Here are some clever hidden storage ideas for your cash:
- Hollowed-out books on your bookshelf for easy access.
- Old electronics, like a broken alarm clock, to hide cash in plain sight.
- False-bottom drawers in furniture create hidden compartments that stay out of view.
- Fake plants can conceal cash in pots under the soil, enhancing your decor.
These creative solutions not only provide discreet storage but also help keep your valuables safe from prying eyes.
With these hacks, you’ll feel empowered to secure your cash effectively!
Creative Cash Containers
When you want to keep your cash hidden yet easily accessible, thinking outside the box can lead to some ingenious solutions.
Consider using creative cash containers to stash your money in plain sight. For example, hollow out an old book and place it on your bookshelf, or transform a coffee can with decorative paper to blend among your kitchen items.
A fake plant can be a clever disguise, hiding rolled bills beneath the soil. You can also repurpose an empty tissue box by swapping tissues for cash, and a hollowed-out bar of soap works wonders too.
These ideas not only keep your cash secure but also impress friends and family with your resourcefulness as a Home Cook!
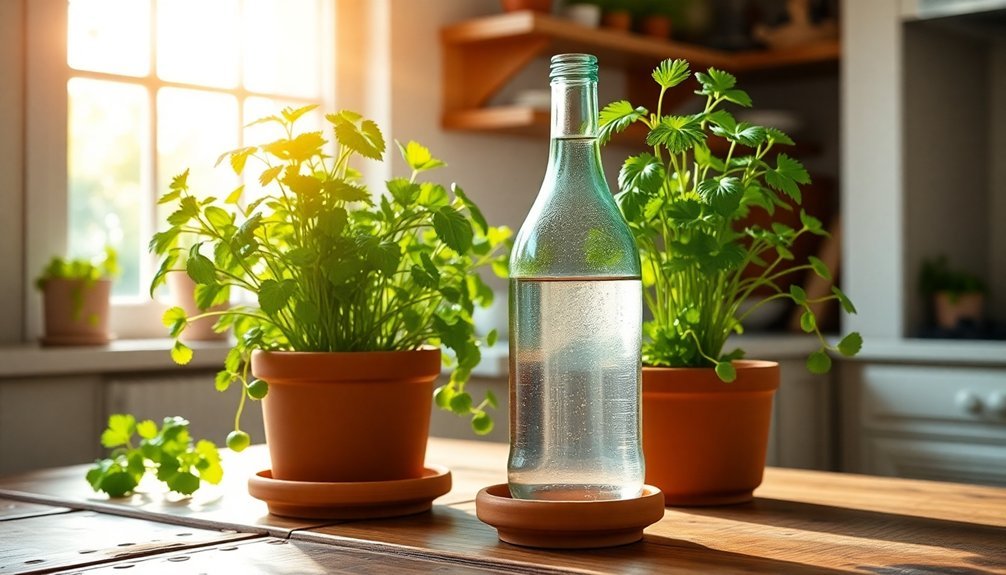
16. DIY Dripper
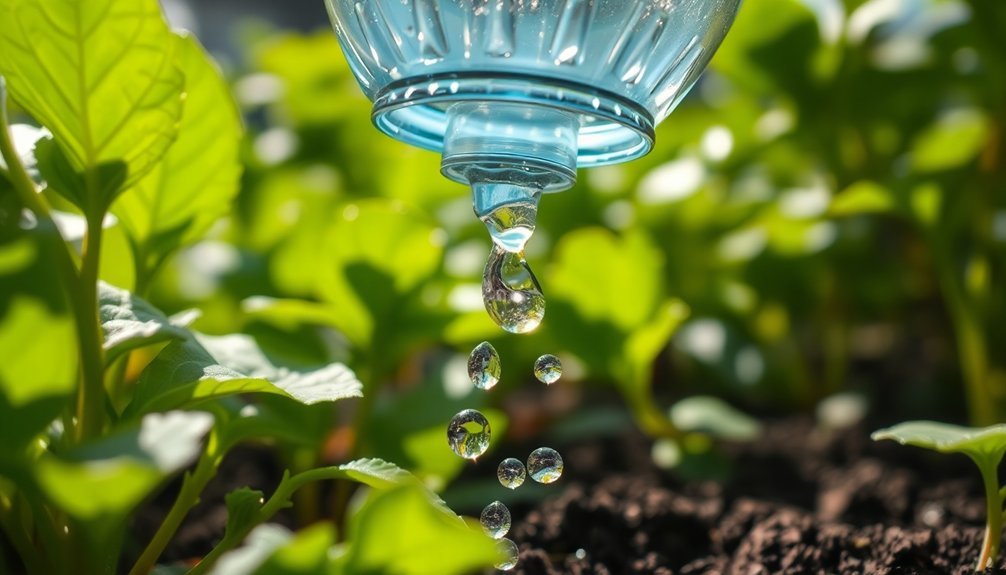
A simple plastic bottle can transform your plant care routine with a DIY drip er that guarantees your green friends stay hydrated even when you’re busy or away.
Here’s how to create a drip er that’s a bit different and effective:
- Take an empty plastic bottle and poke small holes in the cap.
- Fill the bottle with .
- Invert it and bury the neck into the soil near your plant’s roots, ensuring it’s in two corners of the pot for balanced moisture.
- Enjoy the benefits of reduced manual ing and conserve by minimizing runoff and evaporation.
This eco-friendly solution is perfect for potted plants and garden beds, providing moisture over several days while you focus on your life!
17. The Ultimate Extra Hand
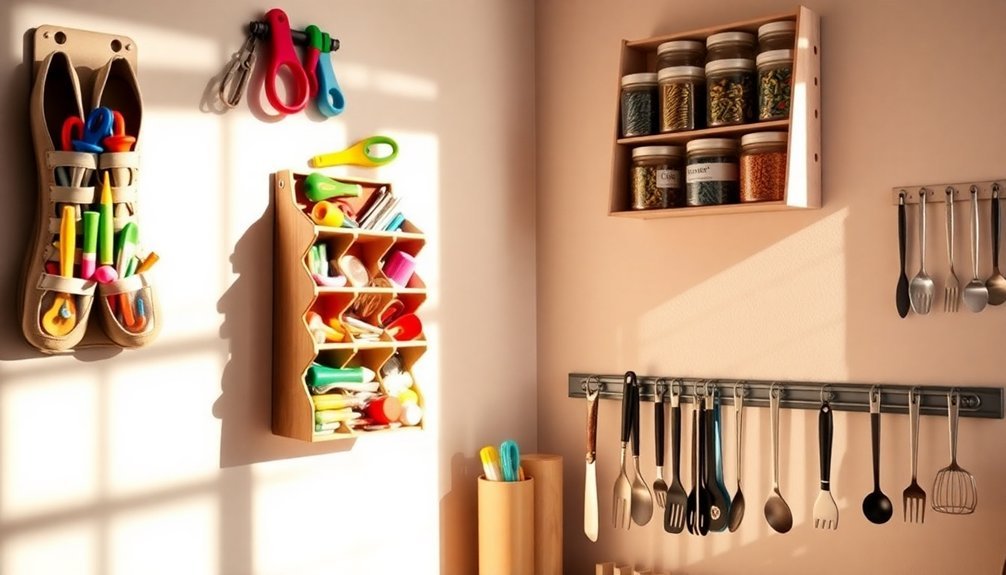
After ensuring your plants thrive with that handy drip er, it’s time to tackle another challenge: managing everyday tasks more efficiently.
You can turn everyday items into extra hand tools that simplify your life. Use S Hooks to hang pictures or tools neatly, cutting down on nail holes and clutter.
Repurpose old pantyhose to secure garbage bags in trash cans, making waste disposal mess-free.
In the kitchen, a pants hanger can hold your recipe books, keeping them clean and accessible while you cook.
For jewelry, bobby pins act as handy tools for putting on bracelets without struggle.
Finally, binder clips help manage cords and cables, providing essential organization hacks for a clutter-free workspace.
Embrace these clever kitchen helpers!
18. How to Double Your Resealable Bags
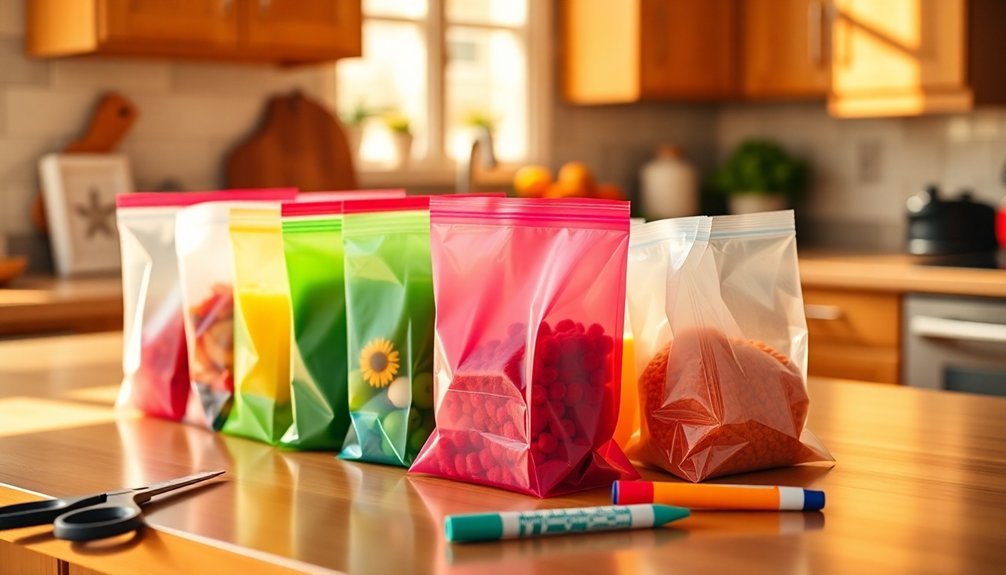
Why not make the most out of your resealable bags?
With these simple resealable bag hacks, you can easily double their functionality while maximizing storage space:
- Cut Bags in Half: Slice along the seam to create two smaller bags perfect for portioning.
- Reinforce Edges: Use clear tape on the cut edges for added durability, especially for heavier items.
- Add a Hole Punch: Create a small hole in the corner of each bag to hang them on a pegboard for better organization.
- Label Clearly: Use a permanent marker or label maker to identify contents quickly.
19. No Air Pump? No Problem! Use a Shop Vacuum
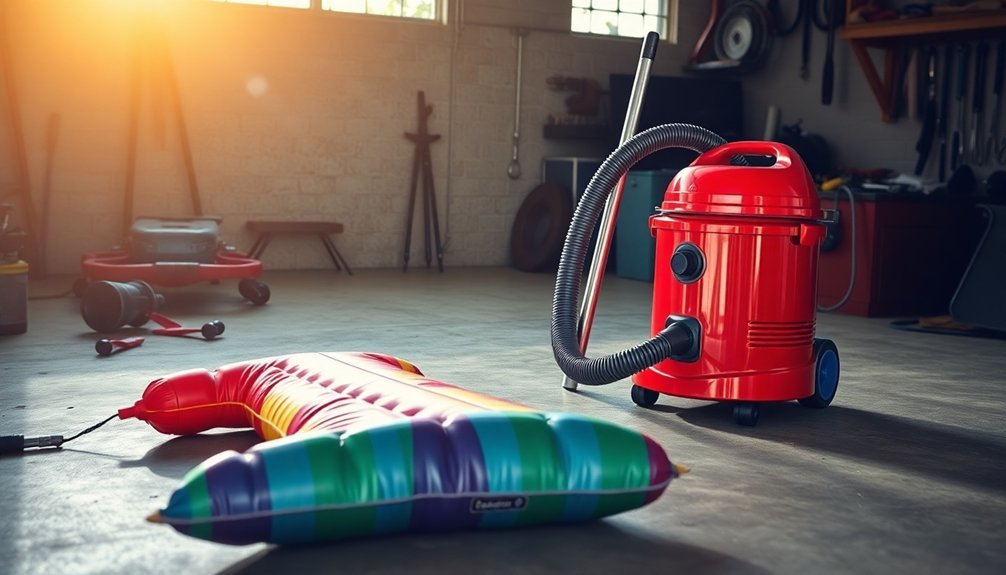
Ever found yourself in a pinch without an air pump when you need to inflate a pool float or air mattress?
Don’t worry—your shop vacuum can save the day! By using shop vacuum inflation, you can enjoy outdoor activity convenience like never before.
Just set your vacuum to blow mode, attach the hose to the valve, and turn it on. You’ll quickly get that air flowing in, and you’ll be ready for fun in no time.
This method not only works wonders for larger items but also provides quick setup solutions that traditional pumps can’t match.
Just make sure the valve is secure to avoid leaks, and keep an eye on inflation levels to prevent over-inflating.
Happy inflating!
20. Instant Picture Frame Bumpers
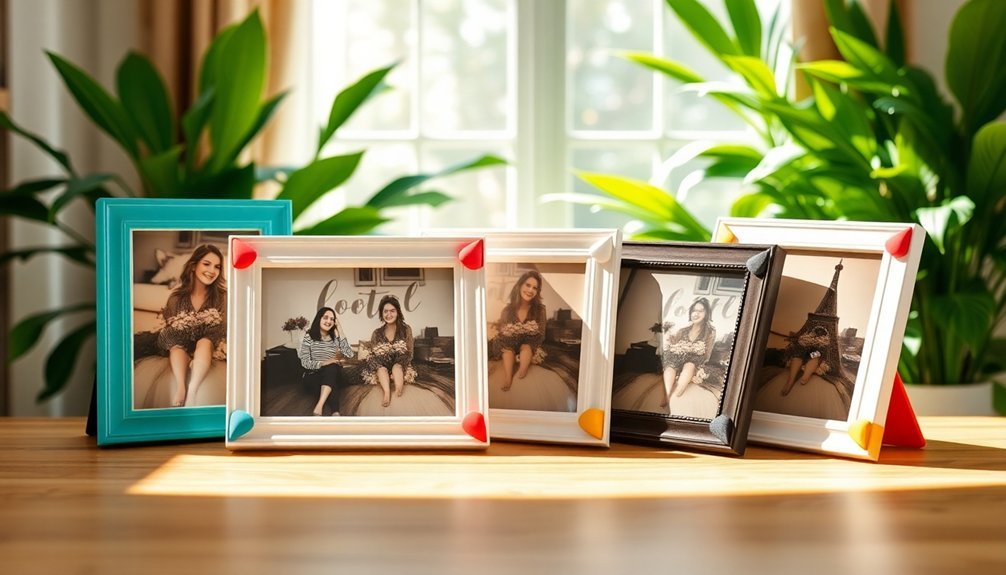
You can easily protect your walls and frames with instant picture frame bumpers.
Just cut small pieces of felt or rubber and stick them to the corners—they’ll keep your frames stable and looking great.
Plus, it’s a simple, eco-friendly DIY project that adds a personal touch to your decor!
Prevent Wall Scratches
While it might seem like a small detail, preventing wall scratches from picture frames can greatly enhance the longevity of both your walls and your decor.
Here are some effective wall protection tips you can apply with DIY bumpers:
- Choose Soft Materials: Use rubber or felt bumpers for a gentle cushion.
- Apply to Corners: Stick bumpers to the back corners of your frames for maximum protection.
- Select Colors Wisely: Pick bumpers that blend with your decor for a seamless look.
- Regular Maintenance: Check and replace worn bumpers to guarantee peak frame maintenance.
Stabilize Frame Positioning
When it comes to displaying your cherished photos and artwork, stabilizing frame positioning is essential for maintaining a polished look.
Using adhesive rubber bumpers on the back corners of your frames provides effective frame stability solutions. These bumpers not only prevent slipping but also absorb shock, reducing the risk of if your frame gets bumped.
With various sizes and shapes available, you can customize them to fit your frame’s dimensions perfectly. Plus, they create a small gap between the frame and wall, allowing for better air circulation and preventing moisture buildup—great wall protection tips!
This simple DIY hack enhances the aesthetic appeal of your framed pictures while preserving the integrity of both the frame and the wall surface.
21. Clean Up Paint in Carpet
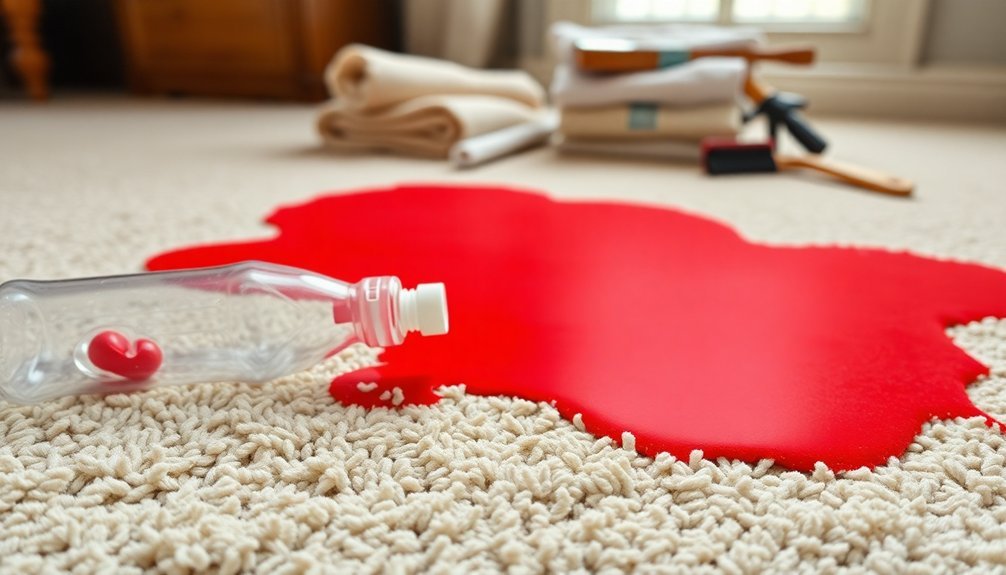
Accidents happen, and finding paint on your carpet can feel overwhelming. But don’t worry; you can tackle this with some effective paint removal techniques.
Here’s a quick guide to help you out:
- Gently scrape off excess paint using a putty knife or spoon to avoid pushing it deeper into the fibers.
- Blot the stain with a cloth soaked in warm soapy or a vinegar- mix, working from the outside in.
- For dried paint, dab rubbing alcohol or acetone on the stain with a cotton ball until it lifts, then blot it.
- Rinse the area with cold and blot dry to remove any cleaning solution and residue.
Remember these carpet cleaning methods and stain prevention tips to keep your space looking fresh!
22. Picture Frame Message Board

After tackling those pesky paint stains on your carpet, it’s time to breathe new life into another item you might’ve lying around: an old picture frame.
Transform it into a stylish dry-erase message board! Simply remove the glass or backing and replace it with a whiteboard surface, or use the existing glass with dry-erase markers.
This DIY project not only allows for frame customization to match your home decor but also provides a functional space for notes and reminders.
Securely mount your message board on the wall or place it on a desk for easy access. Regularly clean the surface to keep it clear.
Embrace this hack for decor integration while reducing paper waste—your home will thank you!
23. Easy Mulch Spreading
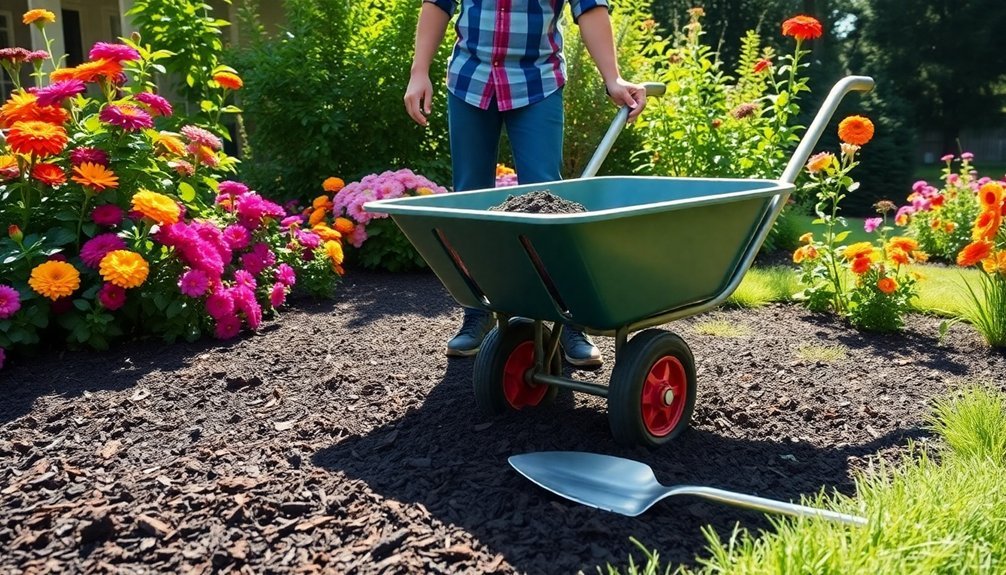
Spreading mulch doesn’t have to be a chore; with the right techniques and tools, you can make it a breeze.
Using a wheelbarrow with a mesh bottom or a mulch spreader can save you time and effort, ensuring an even application.
Plus, by timing your work for cooler parts of the day and wetting the mulch afterward, you’ll enhance its effectiveness while staying comfortable.
Efficient Mulch Application Techniques
When you want to create a lush garden while keeping weeds at bay, efficient mulch application techniques can make all the difference. Here are some tips to enhance your gardening experience:
- Layer it Right: Use mulch layering techniques to spread 2-4 inches evenly for ideal mulch weed suppression.
- Transport Smartly: For larger areas, a mulch blower or wheelbarrow can save time and reduce manual labor.
- Pre-Wet the Mulch: Moistening mulch before spreading minimizes dust and boosts mulch moisture retention.
- Use a Tarp: This handy tool helps transport and dump mulch neatly, keeping your space tidy.
Embrace these techniques, and watch your garden thrive while effortlessly controlling weeds!
Tools for Easy Spreading
Using the right tools can transform your mulch application from a chore into a seamless task. Embrace garden tool innovations like a mulch spreading tool or handheld spreader, which help you distribute mulch evenly and prevent over-mulching.
If you’re dealing with larger quantities, shoveling into a wheelbarrow can save you time and protect your back. For smaller gardens, a garden rake or even a leaf blower can make spreading lightweight mulch quick and effortless.
To keep your mulch in place, weigh it down with natural stones or wood chips, ensuring moisture retention and weed suppression. Aim for a 2-4 inch layer thickness, utilizing these efficient spreading methods to achieve a healthy, thriving garden.
24. Make Any Rug Extra Comfortable
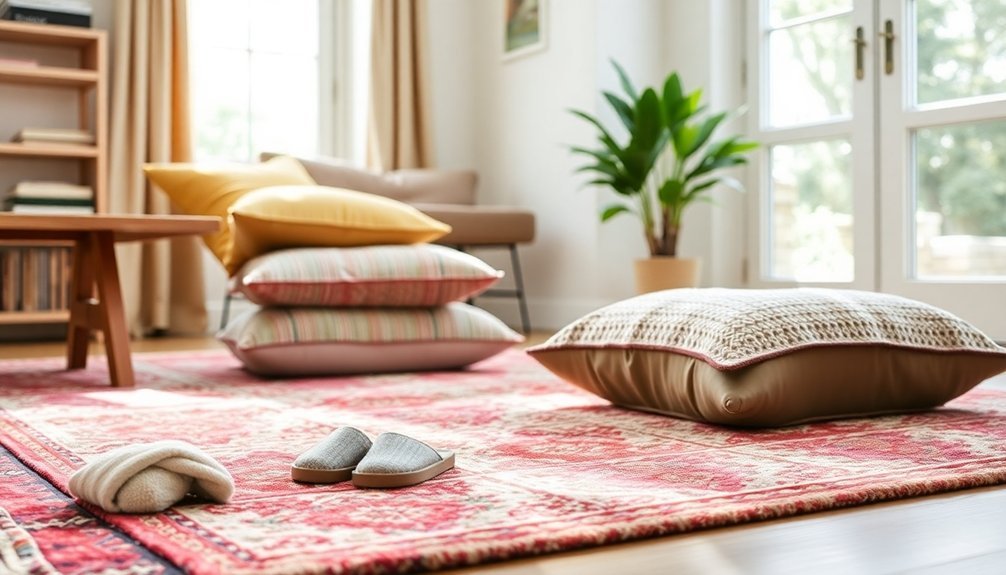
To elevate the comfort of any rug, adding a thick underlay or rug pad underneath can make a world of difference.
Here are some effective rug padding options and layering techniques to reflect upon:
- Thick Underlay: Choose a cushioned rug pad to prevent slipping and enhance comfort.
- Layering Rugs: Layer a smaller, plush rug on top of a flat weave rug for added softness without sacrificing style.
- Foam Tiles: Use foam interlocking tiles beneath your rug, perfect for high-traffic areas like kitchens.
- Soft Fabrics: Drape a fleece blanket or cozy fabric over your rug for warmth during colder months.
Regularly fluff and vacuum your rug to maintain comfort and keep its fibers upright.
Enjoy your newly transformed space!
25. Lampshade Lint Roller
How often do you think about the state of your lampshades? If you’re like most, it’s probably not often enough.
Using a lint roller can revolutionize your lampshade maintenance routine. With its impressive lint roller effectiveness, you can swiftly eliminate dust, lint, and pet hair without damaging the fabric. Just roll the lint roller over the shade, and voilà—clean and fresh!
This dust removal technique saves you time, sparing you from extensive vacuuming or washing. Plus, regular use not only enhances your indoor air quality by reducing allergens but also extends the lifespan of your lampshades by preventing grime buildup.
Embrace this simple hack, and enjoy a tidier, healthier home!
26. Taller Table Hack
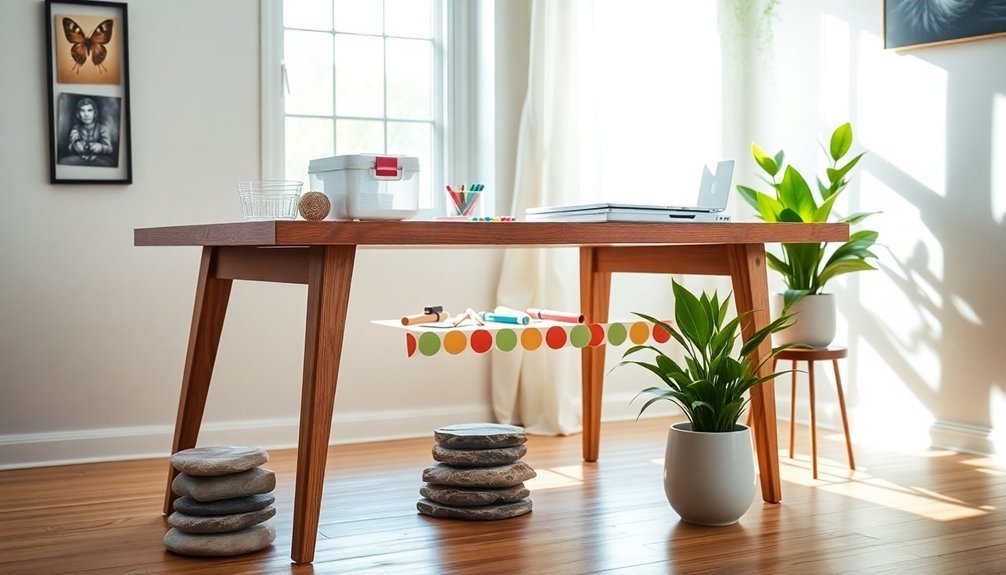
If you’ve ever found yourself hunched over your dining table or struggling to get comfortable while working, a taller table hack might be just what you need.
Here are some simple ways to achieve ergonomic dining solutions with temporary height adjustments:
- Furniture risers: Increase your table height by 3 to 5 inches for better comfort.
- Stacked crates: Use two sturdy blocks under each leg for a quick fix.
- Table leg extensions: Swap your table legs for longer ones from a home improvement store for a permanent change.
- PVC pipes: Cut pipes to your desired length and attach them for a customizable solution.
Always verify stability to prevent spills or accidents!
27. Remove Gum From Carpet
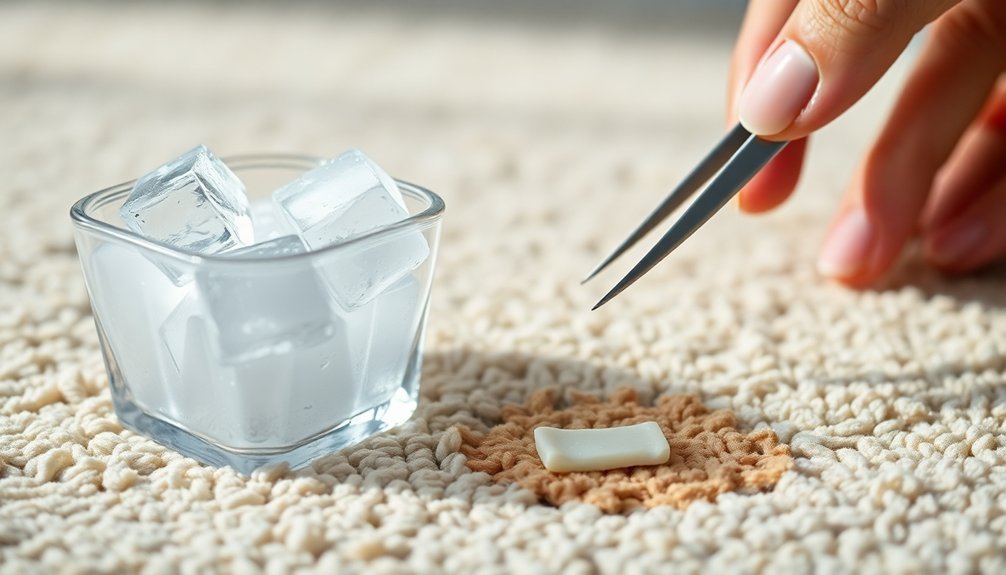
Got gum stuck in your carpet?
Don’t worry, you’ve got some effective tricks up your sleeve, like the freezing method or a simple vinegar and baking soda mix.
If those don’t do the trick, professional cleaning solutions can save the day and restore your carpet to its former glory.
Freezing Method Effectiveness
There’s nothing quite as frustrating as finding gum stuck in your carpet, but the freezing method offers a simple solution that anyone can master.
Here’s how to effectively use this DIY cleaning hack for carpet maintenance:
- Place a sandwich bag filled with ice cubes directly on the gum for 15-20 minutes.
- Once frozen, gently scrape the gum off with a dull knife or putty knife.
- This method is especially helpful for looped carpets, preventing fraying.
- After removal, clean the area with warm soapy to get rid of any residue.
Always test the freezing method on a small, hidden section first to verify it won’t harm your carpet’s fibers or dye.
You’ll have that carpet looking good as new in no time!
Vinegar and Baking Soda
After tackling gum removal with the freezing method, you might want to explore another effective DIY hack using vinegar and baking soda.
This dynamic duo is a fantastic example of natural cleaners that can work wonders in your home. First, mix equal parts vinegar and baking soda, then apply it directly onto the gum.
The vinegar benefits come into play, breaking down the gum’s sticky properties. Let the mixture sit for about 10-15 minutes to soften the gum.
Gently scrub the area with a clean cloth or soft-bristled brush to extract the gum without damaging your carpet. Rinse with warm to remove any residue, blot dry with a towel, and let it air dry completely.
You’ve got this!
Professional Cleaning Solutions
When it comes to tackling gum stuck in your carpet, professional cleaning solutions can be a game-changer.
Here’s how you can effectively remove gum while keeping your carpet in top shape:
- Freeze the gum with a sandwich bag filled with ice cubes for 15-20 minutes.
- Gently lift the hardened gum with a dull knife or putty knife, avoiding to the fibers.
- If any residue remains, mix dish soap with warm and blot the area with a clean cloth.
- For stubborn stains, apply rubbing alcohol on a cotton ball, let it sit, then blot.
Using eco-friendly cleaners and stain removal techniques guarantees your carpet stays pristine.
Remember these carpet maintenance tips for a cleaner home!
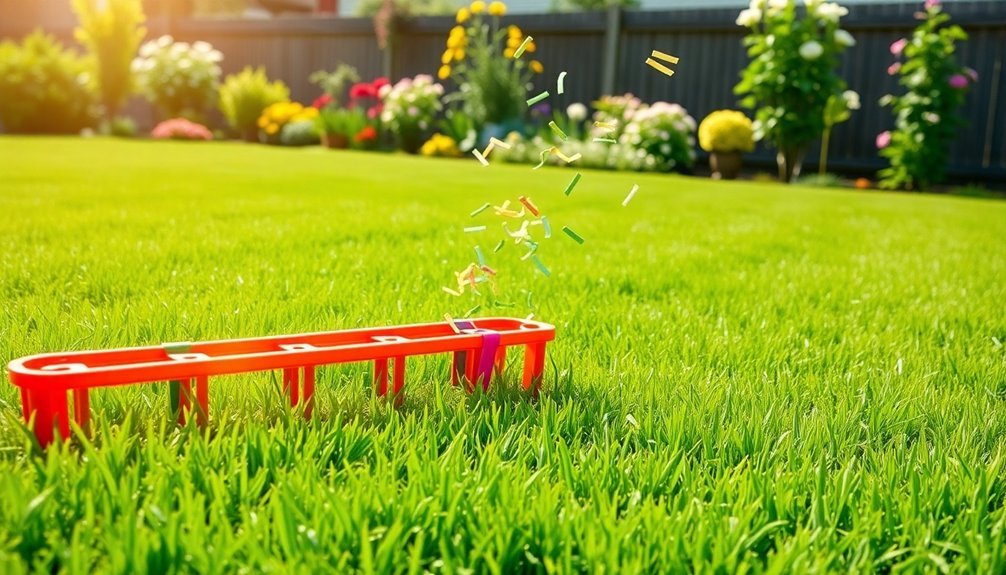
28. Simple Lawn Edging
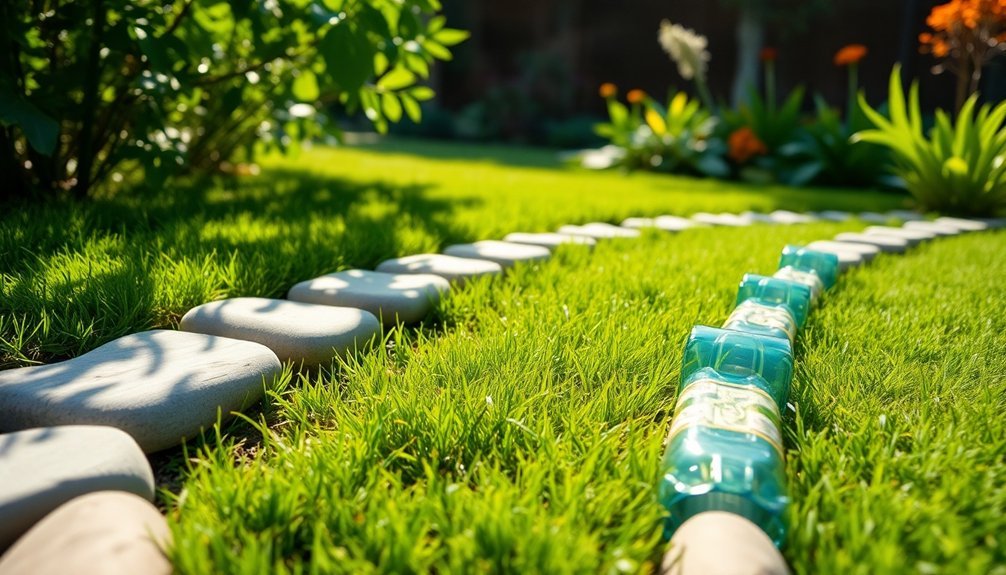
Creating a beautiful lawn doesn’t have to be an intimidating task; with just a few simple hacks, you can achieve clean and defined edges that enhance your outdoor space.
Start by using a 2×6 board as a straight edge to create precise outlines for your flower beds and pathways. Mark your desired edge line with spray paint or string before cutting for an even look.
Consider plastic or metal edging materials to maintain that defined shape and prevent grass from invading your flower beds. Regular flower bed maintenance is key—trim overgrown grass and weeds to keep borders tidy.
Finally, incorporate decorative mulch options along the edge to elevate aesthetics and reduce upkeep. Your lawn will thank you!
29. DIY Wood Filler
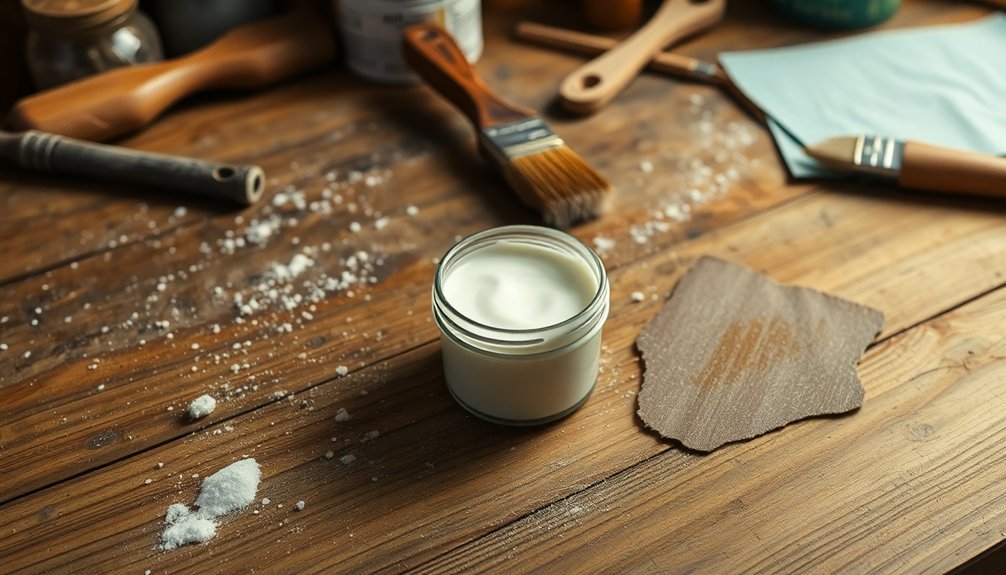
Maintaining a beautiful outdoor space often involves tackling various DIY projects, and repairing wooden surfaces shouldn’t be overlooked.
A DIY wood filler can make your repairs seamless and cost-effective. Here’s how to create it using simple wood filler techniques:
- Mix equal parts of wood glue and sawdust from the same wood type for color matching.
- Adjust the ratio for larger repairs to achieve a thicker consistency.
- Apply the mixture to fill cracks, holes, and scratches.
- Wait about 30 minutes for glue drying times before sanding and staining.
If you don’t have sawdust, consider sawdust alternatives like fine wood shavings or even flour.
This method not only saves money but also reduces waste!
30. Quick Cold Drinks

On a hot day, nothing beats the invigorating taste of a cold drink, especially when you’re short on time.
For quick beverage cooling, wrap a wet paper towel around your bottle and pop it in the freezer for just 15-20 minutes. If you’ve got ice, sprinkle some salt on it to lower the freezing point, chilling your drinks even faster.
Want to skip dilution? Use coffee ice cubes instead of regular ice in your iced coffee.
For a fun treat, blend ice with your favorite drink for instant slushies.
If you’re really in a hurry, pour your drink into a shallow dish; the increased surface area chills it notably faster than a standard glass.
Enjoy your invigorating creations!
31. Healthy Plant Hydration
Keeping your plants hydrated doesn’t have to be a chore. You can easily implement efficient ing techniques and natural moisture retention methods to guarantee your green friends thrive.
Let’s explore some smart hacks that’ll not only save you time but also promote healthier growth.
Efficient Gardening Techniques
While many gardeners struggle with keeping their plants properly hydrated, adopting efficient ing techniques can transform your gardening experience.
Here are some strategies you can implement:
- Drip Irrigation Benefits: Install a drip irrigation system to deliver directly to your plant roots, reducing waste and ensuring consistent moisture.
- Self-ing Pots: Use self-ing pots with reservoirs to allow plants to absorb as needed, especially helpful in hot weather.
- Soaker Hoses: Lay soaker hoses in your garden beds for slow, deep ing that reaches the entire root zone without runoff.
- Rain Barrel Usage: Collect rain using a rain barrel for a sustainable, cost-effective source.
Natural Moisture Retention Methods
To guarantee your plants stay hydrated without constant attention, consider implementing natural moisture retention methods that work with the environment.
One of the best mulch advantages is its ability to substantially reduce moisture evaporation from the soil, keeping your plants hydrated longer. You might also want to incorporate -retaining crystals into your soil to enhance retention, allowing plants to absorb moisture more efficiently.
A drip irrigation system is another smart choice, delivering directly to the roots and minimizing waste. Additionally, planting drought-resistant species guarantees your garden thrives with less frequent ing.
Finally, creating a rain garden captures rain, providing a natural irrigation source. Embrace these techniques to cultivate a resilient, flourishing garden!
32. Your Shoes Will Look New
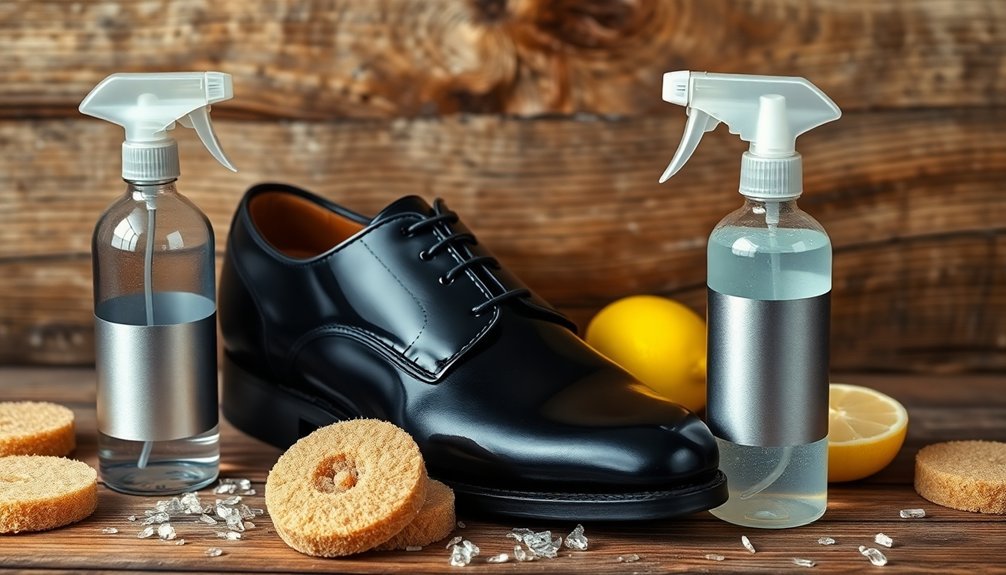
If you want your shoes to look brand new without spending a fortune, there are several simple hacks that can work wonders.
By employing these shoe maintenance techniques, you’ll not only enhance their appearance but also extend their lifespan.
- Scuff Removal: Gently rub a pencil eraser on scuff marks for a quick fix.
- Sole Whitening: Mix baking soda and to create a paste that rejuvenates rubber soles.
- Leather Protection: Apply a thin layer of clear nail polish to tips to prevent scuffing.
- Fabric Refresh: Use equal parts vinegar and to scrub fabric sneakers and eliminate stains.
33. Lawn Mower Grass Chute Saver
Keeping your lawn neat and tidy can feel like a chore, but with a simple DIY lawn mower grass chute saver, you can make mowing easier and more efficient. This handy tool prevents grass clippings from blowing out of the chute, enhancing your grass clipping management. You can easily create one using a piece of cardboard or plastic, cutting it to fit snugly over the discharge chute.
Not only does this hack minimize mess, but it also directs clippings back onto your lawn, providing natural fertilizer as they decompose.
34. How to Make Durable Sandpaper
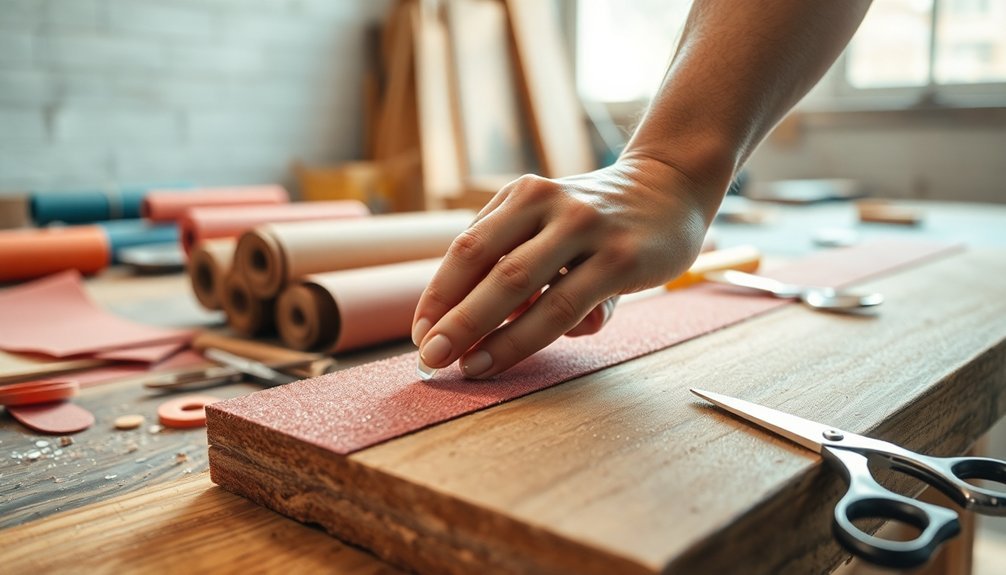
Creating your own durable sandpaper is easier than you think and can save you both time and money.
You’ll need a sturdy backing, a strong adhesive, and abrasive material to get started.
Let’s explore the simple steps and tips that will guarantee your homemade sandpaper lasts longer and works harder.
Materials Needed for Sandpaper
Crafting your own durable sandpaper can be a rewarding project that enhances your DIY toolkit. To get started, gather these essential sandpaper materials:
- Fine-grit sand, powdered emery, or aluminum oxide – These provide the abrasive quality you need.
- Strong adhesive options – PVA glue works well to create a cohesive texture.
- Backing choices – Sturdy materials like cardboard or fabric offer added strength.
- Clean, smooth surface preparation – Ensuring your backing is clean enhances durability.
Once you’ve assembled these materials, you’re on your way to creating effective sandpaper tailored to your projects.
Just remember to let it dry thoroughly in a well-ventilated area before using it. Happy crafting!
Sandpaper Creation Process
Making your own durable sandpaper opens up a world of customization and efficiency for your DIY projects.
Start with a sturdy base like heavy cardboard or a flat wooden board to guarantee stability. Choose the right adhesive options—spray adhesive or strong glue—to evenly coat your base, allowing for a secure bond.
For grit selection, think about your project’s needs; use coarser sandpaper types (60-80 grit) for heavy material removal and finer grits (220-400) for smoothing finishes.
Cut your sandpaper to size before applying it to the base, ensuring it fits comfortably in your hand.
Finally, let the adhesive dry completely to maximize durability and effectiveness in your sanding tasks.
Get creative and enjoy the process!
Tips for Durability
While you might think that any sandpaper will do, choosing the right materials and techniques can greatly enhance its durability. Here are some sandpaper longevity tips to help you create a lasting product:
- Use high-quality backing paper: This guarantees a solid foundation that withstands wear and tear.
- Follow an adhesive selection guide: Strong adhesives like spray adhesive or contact cement prevent peeling during use.
- Choose abrasive materials wisely: Opt for aluminum oxide or silicon carbide for their superior longevity.
- Consider thicker grit sizes: This reduces clogging and extends the lifespan of your sandpaper during heavy sanding tasks.
Store your homemade sandpaper in a cool, dry place, avoiding bending to maintain its integrity.
With these tips, you’ll create durable sandpaper that gets the job done!
35. Use This Simple Hack to Save Your Phone Charger
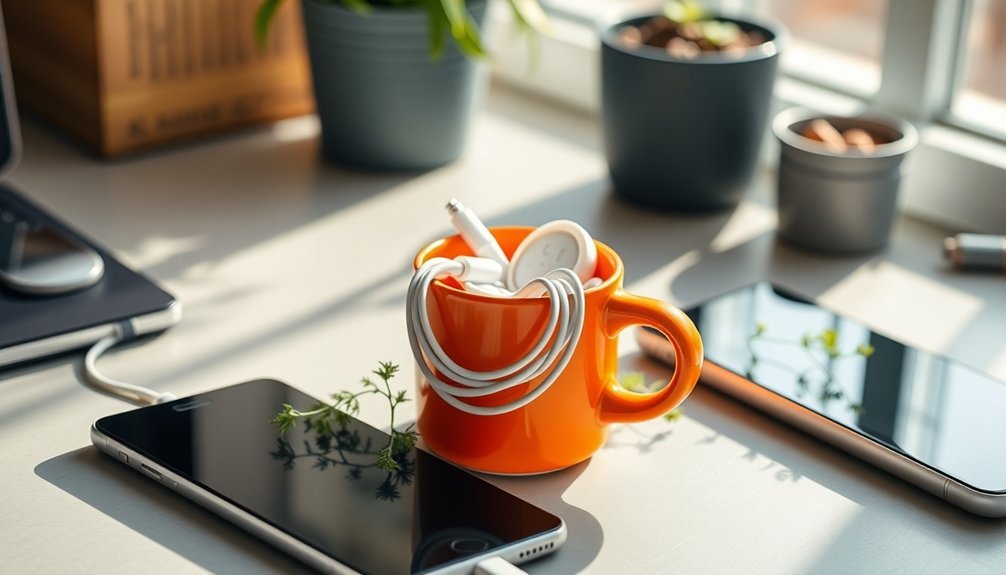
To keep your phone charger in top shape, consider a clever hack that can save you both money and frustration. Instead of spending on expensive DIY cable protectors, grab a spring from an old pen.
Slide it over the cable near the connector to provide extra reinforcement. This simple trick absorbs stress and tension, preventing fraying at the vulnerable points. It’s an eco-friendly solution that not only extends your charger’s lifespan but also applies to various devices, like laptops.
Make sure the spring is tightly secured to avoid slipping during use. Incorporating these charger maintenance tips into your routine will empower you to keep your electronics working longer while being kind to the planet.
Conclusion
With these 35 brilliant DIY hacks at your fingertips, you’re armed to tackle everyday challenges like a knight with a shining sword. Each tip is a gem, waiting to transform your mundane tasks into moments of triumph. Imagine a world where highlighter stains vanish like morning mist, and your shoes sparkle like new stars. Embrace your creativity, and let these hacks illuminate your path, turning the ordinary into extraordinary. You’ve got this—make life smoother, one clever trick at a time!